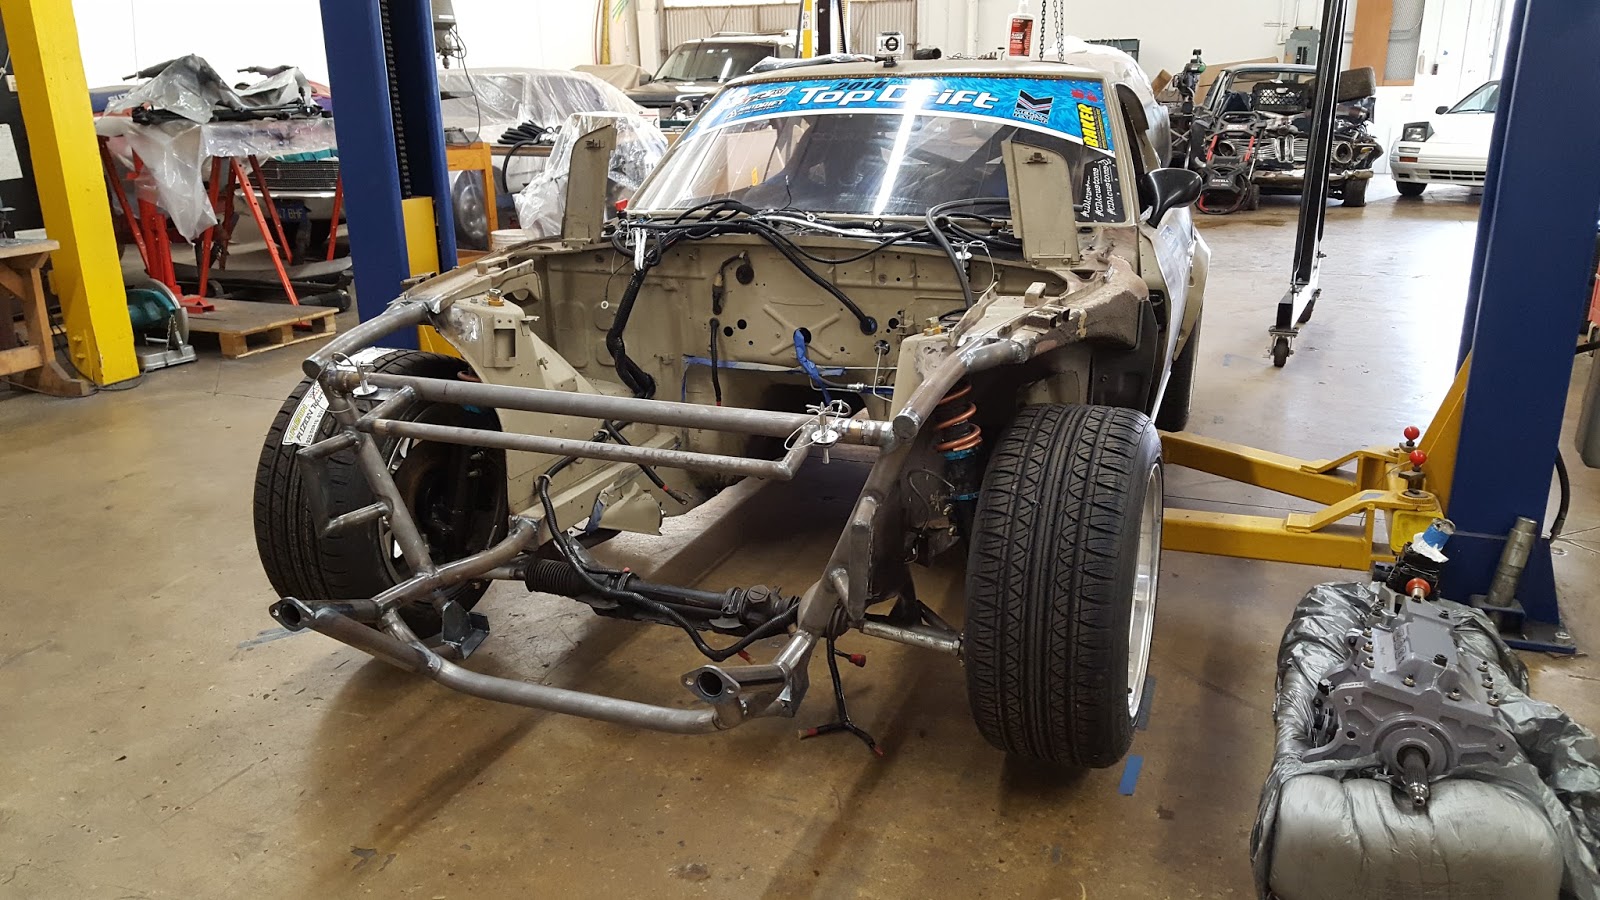
I finally made the decision to do a completely tubular rear end. The benefits in weight savings, utility, safety, and simplicity are enormous. The rear is not going to stay like this, I am building a fiberglass rear end as well. With this I can have plenty of confidence to get close to the walls on oval tracks.
The fiberglass widebody is coming along nicely. The plugs for the molds are complete and I am building the molds for the front fenders right now.
Each fender was built using 24 individual pieces of sheet metal and smoothed using filler.
Once the metal "plug" is completed, I lay the gel-coat, fiberglass and resin.
The front fender mold (on top) and final product (on bottom).
The rear end molds were built right off of my spare S30 chassis. These are stock over-fenders.
Over-fenders fit up on the car using Riv-Nut inserts.
Its been quite a lot of work achieving 65° of steering angle, there was quite a bit of fabrication involved. The way my front suspension and steering is set up has no interference, rubbing, or clearance issues.
Achieving huge angle is all about creating clearance for the wheel and the suspension components associated with the hub and steering knuckles. Creating this clearance is all about designing a good lower control arm and moving the wheel away from the frame. This means you must create a much longer LCA and move the shock mount point farther from the center-line of the car. Moving the shock mounting point for this kind of clearance means cutting out a portion of your frame. You also need longer outer tie rods.
The knuckles were shortened to the extreme, basically as much as they could be. I also reinstalled the rack spacers, however I shaved each of them down to .080" thick, from their original .145" to create the perfect stopping point.
I took the car out for testing shortly after, everything worked great!
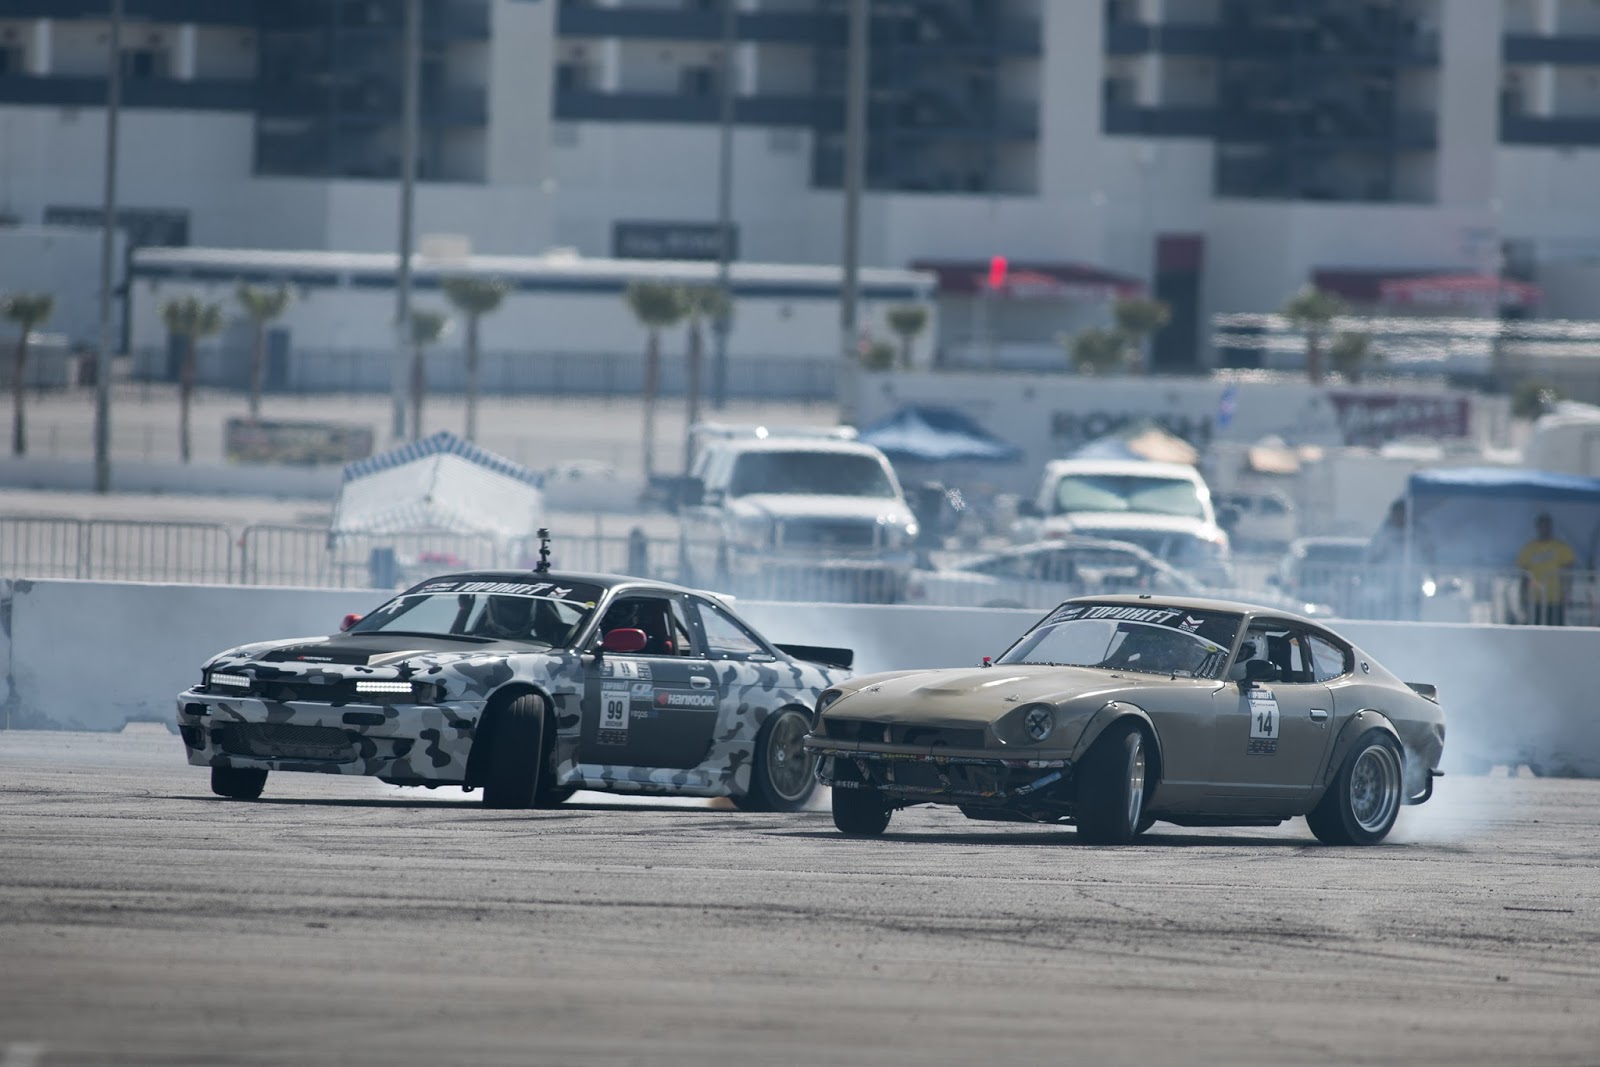
All Star Bash was a ton of fun! I was driving really well both days. In the morning on both days I was battling fuel delivery problems, the foam in my fuel cell was breaking apart and clogging my pre-filter so i was constantly unclogging it. Other than that the car was working very well.
Thanks to everyone doing media that day getting some great shots!
Street Driven Tour was awesome! Car ran great. I didn't get too many tandems, it took a while for all the drivers to get comfortable driving with each other. I lead many tandem runs, that's just the way it worked out in the que.
I really didn't have any problems with the car until late in the day, my handbrake locked up on me. I decided to pack up at that point and fix the problem at home, which was an easy fix.
Well, I managed to mangle my car pretty badly. I made a mistake coming into the second bank at Irwindale Speedway. The car is functionally fine, however the aesthetics are less appealing currently. The rear end has been smashed and needs to be chopped and replaced, the plan is to build a wide-body out of fiberglass for the entire car. Which, in the event of an accident can be taken off and replaced at the track.
Round 4 was fun but also disappointing. Practice was not going well on Friday because I was having trouble with my front wheel clearance. My front tires were rubbing up on both my front tube frame and also my rear wheel well near full lock. As a result I would spin out when I got too much angle.
I changed my front tires from soft Federal 245's to a harder compound 225. This fixed the problem completely and now I have plenty of clearance, I also did not notice a loss of grip on the front from the different compound and size.
Practice on Saturday went very well and I thought my qualifying runs were good but it turns out that they were not enough. I knew I was far from the wall but I still thought that I would qualify.
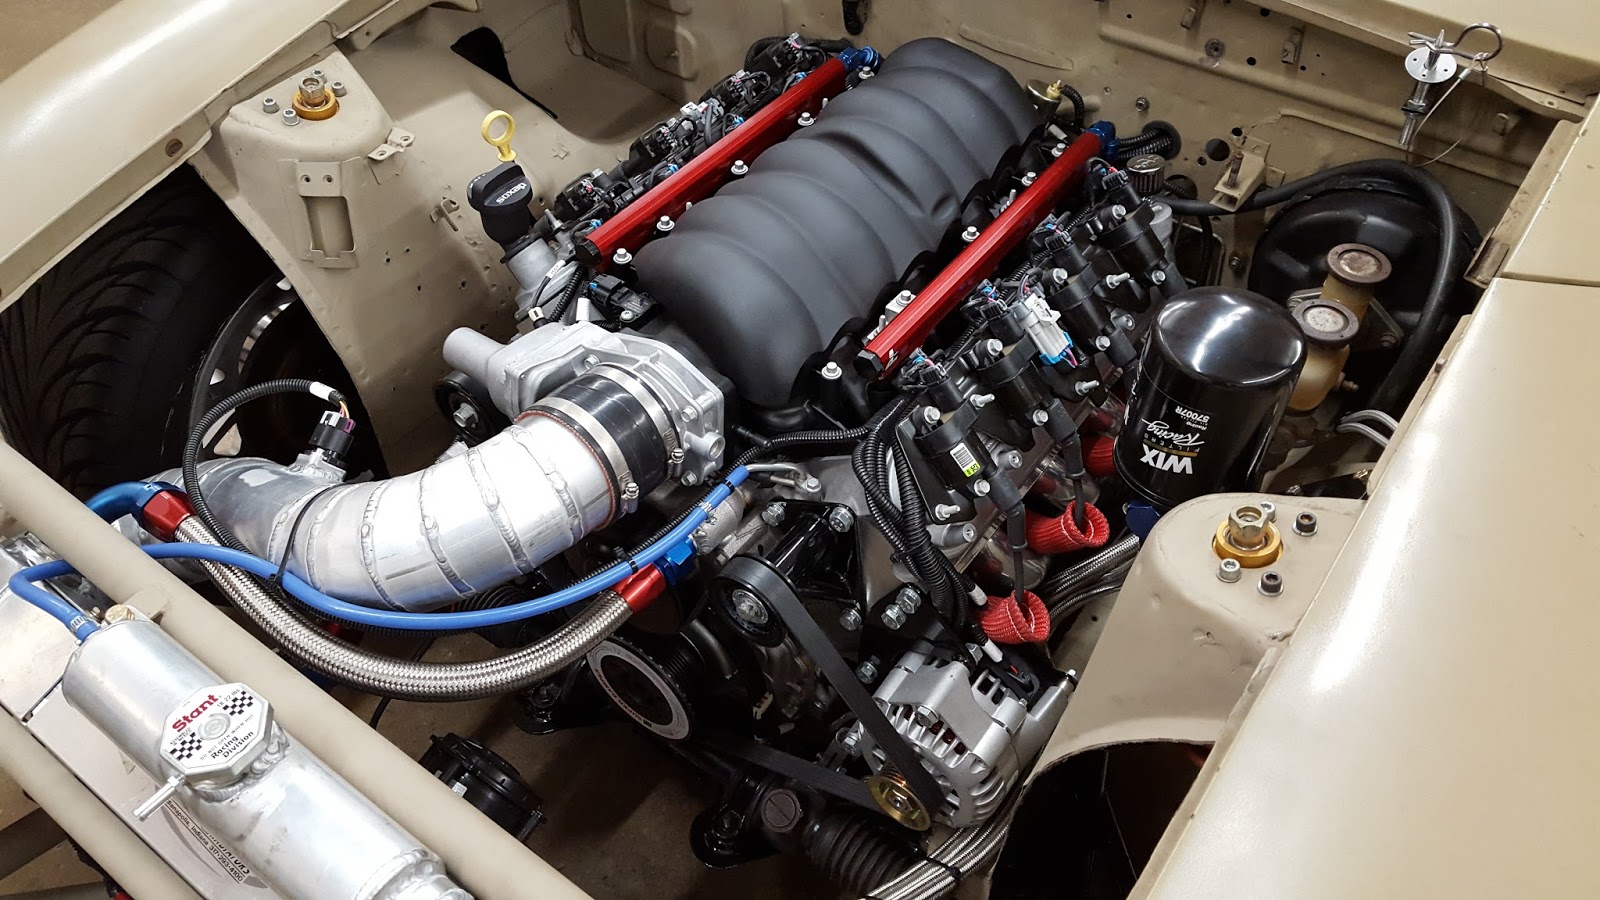
Its taken me three months to finish this engine swap. The rotary didn't take anywhere near as long and was much easier to do! A V8 does NOT belong in an S30 chassis, the frame is simply too narrow to accommodate the exhaust manifolds PRACTICALLY. Basically everything below the heads is extremely cramped, it would be very difficult to fix anything on the bottom side of the engine on a track day.
I drove the car for the first time at Willow Springs Walt James Stadium, which is a 1/4 mile paved oval with no walls. The engine was perfect, it was 100 degrees the whole day and the engine coolant temperature stayed between 190-210. Oil pressure around 50psi. Also, nothing broke!
The engine is a Chevrolet LS3 480hp 475torques with an aggressive cam. Bolted to a 4 speed dogbox. Clutch is a Quarter Master 3 disk clutch. OC Drivelines driveshaft and Driveshaft Shop axles. The R200 differential has been more than enough to handle the power so far.
All fabrication, welding, wiring, assembly, and design done by Alex Grimm.
If you like the car and want to see what I'm up to follow me on Instagram @DriftTheZ
This was the most difficult engine swap I have ever done, the space around the bottom end of the engine is extremely limited. The engine mount bolting points are bellow the top of the frame rails and way behind the front subframe, so the engine mounts had to be substantial. The exhaust is all around the oil pan and has to be extremely close to it.
The wiring was simple, just plug and play ECU and Harness from Chevrolet. However for some INEXPLICABLE reason Chevrolet pretty much took a harness and all these parts from some random car they make, so the fuse box, ECU, pedal assembly, and all the gauge sensors on the engine are car specific making this "Universal Harness" more difficult to install. Nonetheless it works extremely well, after completely changing the pedal mount, installing all new gauge sensors, mounting a hilarious fuse box, and adding some wiring to make the tachometer work.
I decided to cut out the original front end and replace it with something a little more efficient.
I was getting frustrated trying to understand all of the strange LS serpentine belt configurations and all of the different alternator choices so I JUST MADE MY OWN! Works perfectly.
Driver Side Engine Mount
Passenger Side Engine Mount
Transmission Mount
The exhaust was very difficult as well, the X Pipe complicated everything. Every bend in the exhaust has been done with 15 degree pie cuts and fully TiG welded. The tubing is 2.5in Stainless Steel.
The engine is also MUCH lower than the rotary was, the bottom of the oil
pan is 1-2 inches lower. This was fine since I had to make a new skid
plate and also had to raise the car up 1inch so that the rear wheels
wouldn't hit the fender flares when it squats.


 Once the metal "plug" is completed, I lay the gel-coat, fiberglass and resin.
 The rear end molds were built right off of my spare S30 chassis. These are stock over-fenders.